FYI: This website contains affiliate links. As an Amazon Associate I earn from qualifying purchases.
- Home
- Urban Farming and Gardening
- Rain Barrels
Rain Barrels: A Beginner's Guide
By Amy DeVries
Short answer: To set up rain barrels, choose an opaque barrel with a screened lid, a spigot, and an overflow port. Set it on a sturdy, level stand under a downspout. Connect the downspout or a diverter, and route the overflow away from your foundation. Use the water on your garden, and empty the barrel before freezing weather.
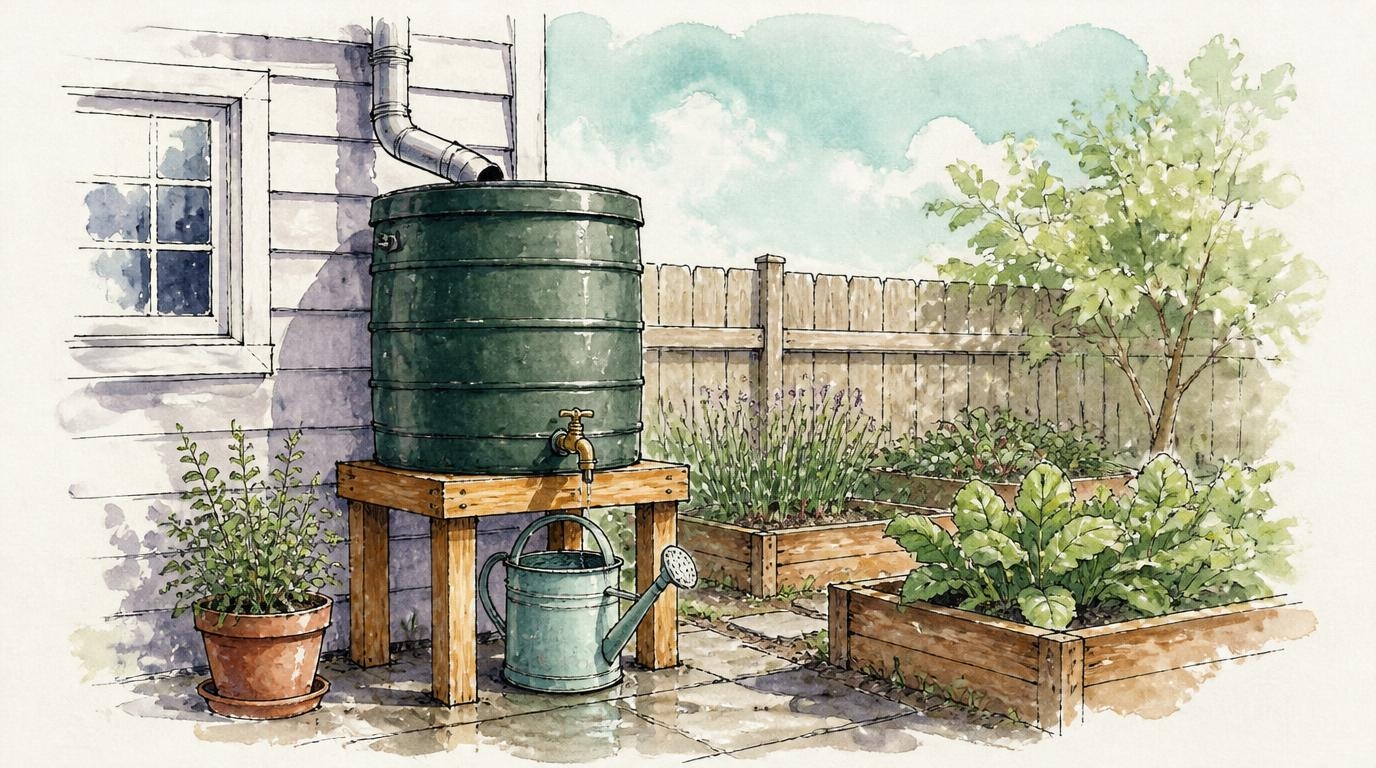 One barrel, one downspout, and a level spot is all it takes to start saving rain for your garden.
It always seems like we get too much rain in spring and not nearly enough in summer. Our rain barrels bridge that gap. They've been essential for helping our garden survive long, hot, dry stretches of summer.
A rain barrel is one of the simplest homestead systems you can start. You don't need much space, special skills, or a big budget. You need one barrel, one downspout, and a level spot.
This page walks you through choosing a barrel, deciding where it goes, and getting it set up. When you're ready to go deeper on any step, I'll point you to a page that covers it in detail.
Why use a rain barrel?
- Free water when the garden needs it most. Rain falls on its own schedule. A barrel stores it until your plants are thirsty.
- Less runoff. Water that would rush across the yard or toward the street gets slowed down and saved.
- Fewer soggy spots. Catching water at the downspout can help with muddy patches and puddling near the house.
- A gentle first system. It runs itself most of the year and teaches you a lot about how water moves around your property.
Rain barrel water is for the garden, not for drinking. Untreated rainwater picks up whatever is on your roof and gutters.
Choosing a rain barrel
You don't need the fanciest barrel. You do want one with a few basics, because adding them later is a hassle.
- A screened or sealed lid. This keeps out leaves and mosquitoes, and it keeps kids and pets safe. More on that in Mosquito-Proof Rain Barrel.
- A spigot near the bottom. This is where you fill watering cans and jugs or attach a hose.
- An overflow port near the top. A full barrel has to send extra water somewhere. See Rain Barrel Overflow Routing.
- Opaque, dark plastic. Light-colored or see-through barrels let sunlight in, which grows algae. See Preventing Algae in Rain Barrels.
- Food-grade plastic, especially if you're reusing a barrel. Skip any barrel that held chemicals.
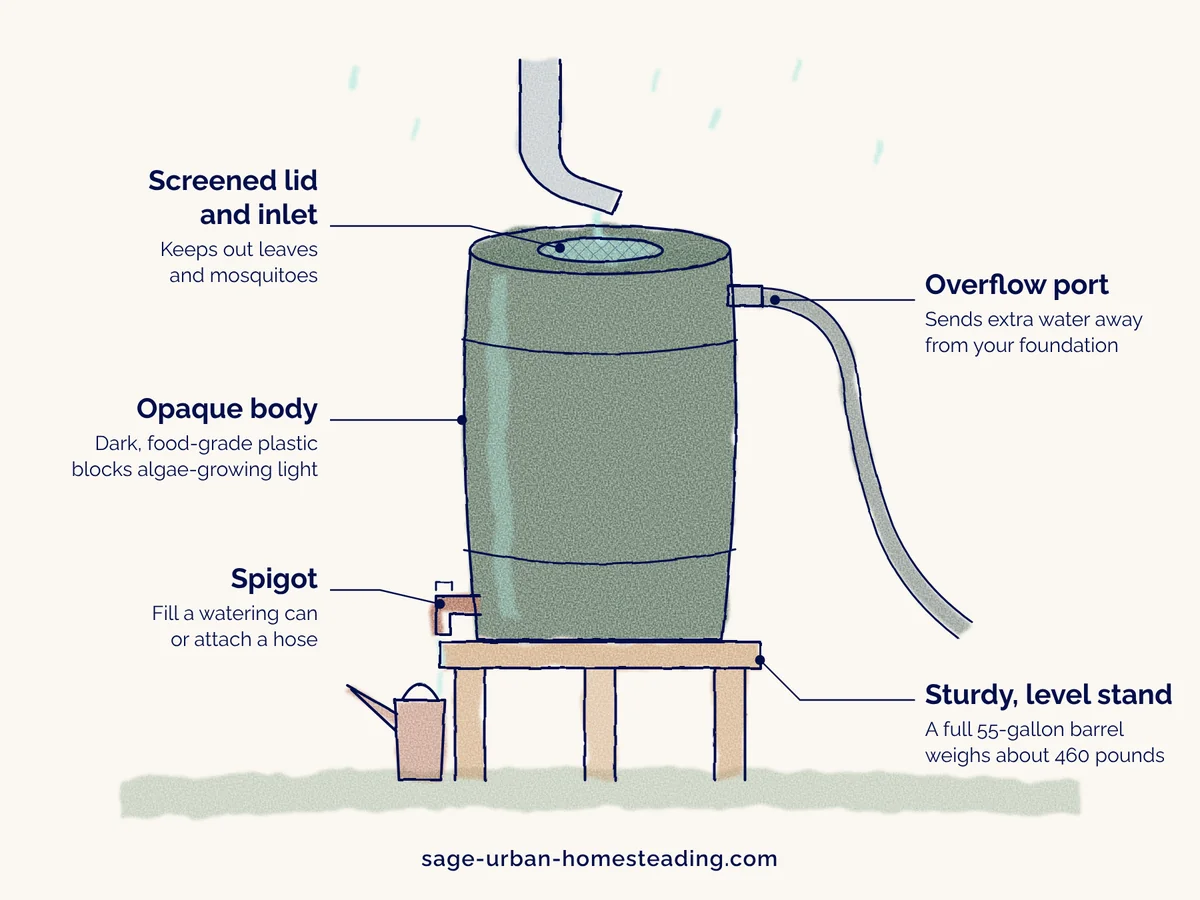 What to look for when you choose and set up rain barrels, including a stand strong enough for a full barrel.
What size? A 50 to 55 gallon barrel is the classic starting point. It fits beside most downspouts and fills surprisingly fast in a good rain. You can always add a second barrel later.
Adding more barrels. When one barrel fills too fast, you can link a second one. Set the barrels on stands at slightly different heights and run a hose from the first barrel's overflow port into the next barrel. Water fills the highest barrel first, then spills into the lower one. The last barrel in the line still needs its own overflow route. See Rain Barrel Overflow Routing.
Buy or DIY? Buying a complete barrel is the low-overwhelm choice for a first system. Converting a used food-grade drum saves money but means drilling holes and sealing fittings yourself.
Check your local rules first. Collecting rain from your roof is legal in every state, and most have no limits on a backyard barrel. A few Western states cap how much you can store, and some HOAs restrict barrels for looks, so a quick check with your state, town, or HOA is worth it. While you're at it, ask your town or water utility about rain barrel rebates. Some offer them.
Where to put your rain barrels
The right spot makes everything else easier. Look for these four things.
- Under a downspout. Pick the one that drains the most roof area, or the one closest to where you'll use the water.
- Near the garden, if you can. Water is heavy to carry. Our yard slopes, and our gutters drained to the low end. Water from the barrels could reach the lower beds by hose, but we carried jugs up to the higher beds. If you can, put the barrel uphill from what it waters.
- On solid, level ground. A full 55 gallon barrel weighs around 460 pounds. A wobbly base can tip it, so raise it on a sturdy stand. Height also gives you room to fit a watering can under the spigot and adds water pressure. See Rain Barrel Stand Design.
- Away from foundations and walkways, or with a plan for where the overflow goes.
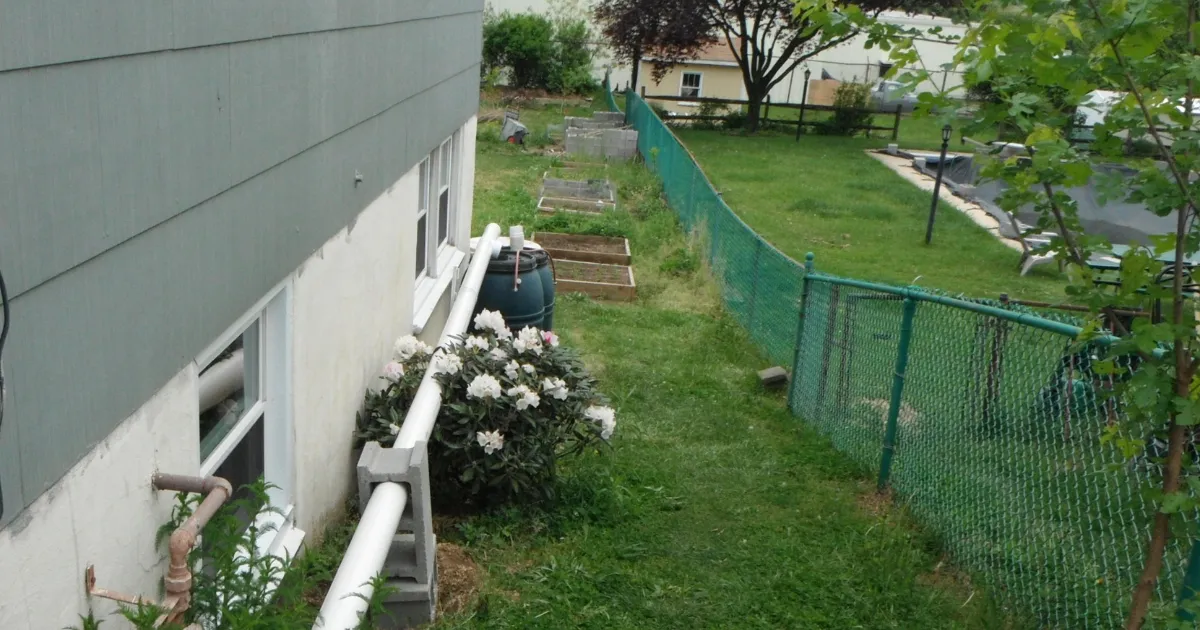 We used long pipes to bring water from the gutters on both sides of the house to barrels at one corner.
A note on roof material: Water picks up whatever is on the roof. We eventually stopped using water from our house's asphalt shingle roof on the garden and now collect only from a metal shed roof. Roof type is worth thinking about before you choose your downspout.
Getting water into the barrel
There are two common ways to connect a barrel to a downspout.
- Open downspout over the lid. Cut the downspout short so it ends above the barrel's screened lid. It's simple and cheap. This is how our first barrels worked, and in a heavy downpour the water shot right past the opening and into the yard like a waterfall.
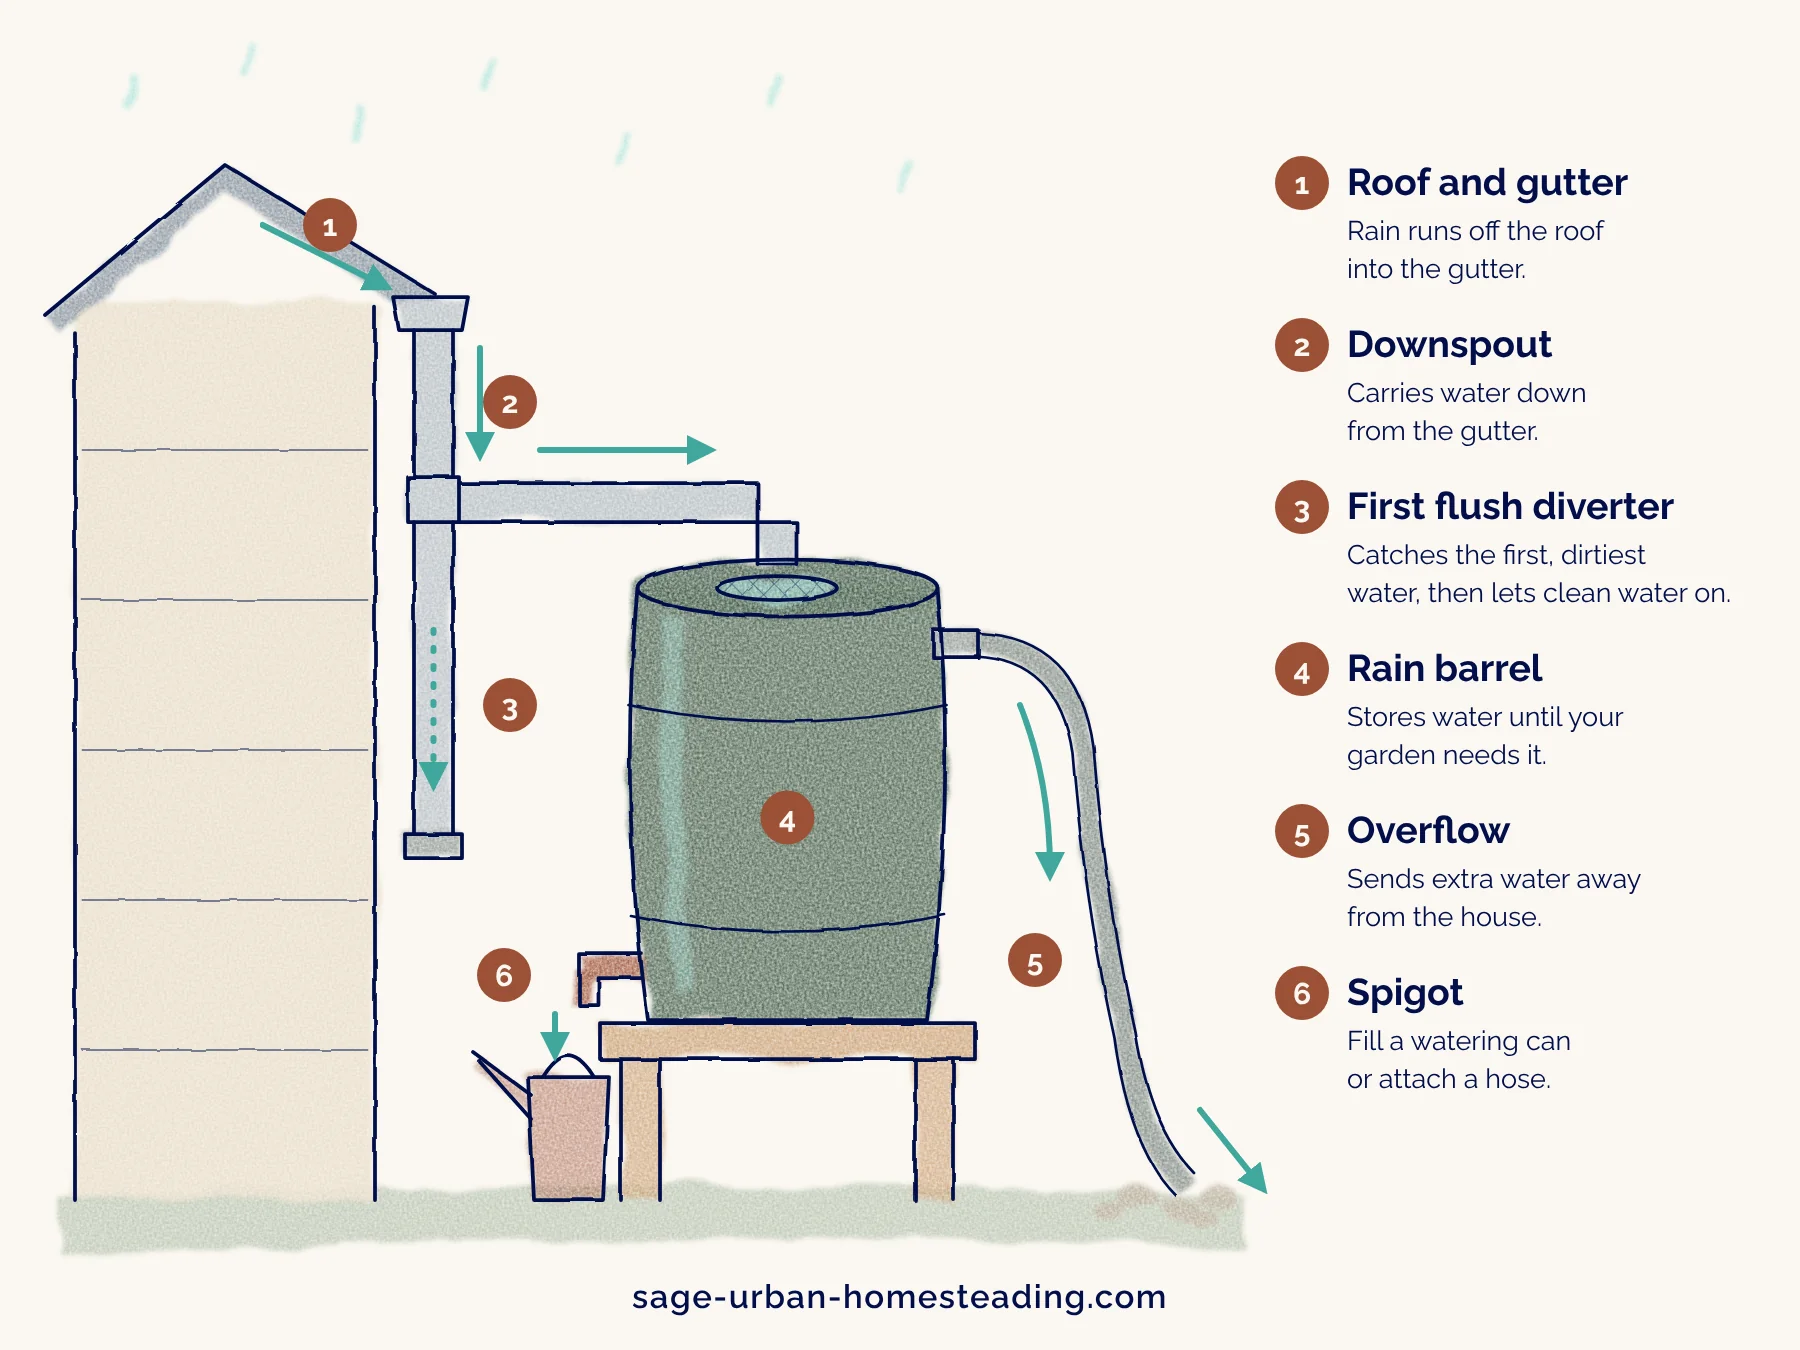
- Downspout diverter. A diverter fits into the downspout and sends water into the barrel through a hose. Many send water back down the downspout once the barrel is full. Compare the options in Downspout Diverter Options.
The first rain after a dry spell washes the most dirt, pollen, and debris off the roof. A first flush diverter sends that dirtiest water away before it reaches your barrel. We use one on our rain tanks now. Learn how they work in First Flush Diverter Basics.
How we use our rain barrel water
We kept it simple. We filled old one-gallon milk jugs from the spigot and set them around the garden with the lids on, so there was always water ready to grab when something looked thirsty.
When the barrel was really full, we hooked up a garden hose to water faster. That works best when there's plenty of water in the barrel and the barrel sits higher than the garden.
We also turned those milk jugs into a slow-drip watering trick for individual garden beds. If you'd like to water with less carrying, see Gravity Drip Irrigation from Rain Barrels, which covers the jug method and other gravity-fed options.
Rain barrel setup checklist
It took us a while to get our system right. You can skip some of that trial and error by working through it in this order.
- Check your HOA and local rules, and ask about rebates.
- Pick your downspout and check where the water will need to go.
- Choose a barrel with a screened lid, spigot, and overflow port.
- Build or buy a level stand that can hold the full weight. See Rain Barrel Stand Design.
- Connect the downspout, either cut short over the lid or with a diverter. See Downspout Diverter Options.
- Plan the overflow so extra water flows away from your foundation. See Rain Barrel Overflow Routing.
- Add a first flush diverter if you want cleaner water. It's optional for a first barrel. See First Flush Diverter Basics.
- Wait for rain and fill your first watering can.
You don't have to do every step perfectly before you start. A barrel on a sturdy base, under a downspout, with a lid on top is already working.
Not sure if a rain barrel is the right first step for you? My free 2-page guide, Which Urban Homestead System Should You Start First?, helps you pick the system that fits your space and time.
Keeping your rain barrel working through the seasons
A rain barrel needs only a little attention a few times a year.
- Mosquitoes: Keep the lid screened and sealed, and fix any gaps. See Mosquito-Proof Rain Barrel.
- Algae: Block sunlight and keep debris out. See Preventing Algae in Rain Barrels.
- Overflow: Check after big storms that extra water is going where you planned. See Rain Barrel Overflow Routing.
- Winter: Empty the barrel and remove the spigot or keep it turned to the open position before freezing weather. Ice can warp the plastic and cause leaks in spring. See the Winterizing Rain Barrels Guide.
When one barrel isn't enough
I started homesteading on a quarter acre inside the Baltimore Beltway, with rain barrels tucked under the downspouts like the ones on this page. We've since outgrown that space. Today we collect rain in 200-gallon tanks under the roof of a metal shed near the garden and animals, with a first flush diverter.
I'm telling you this so you know the barrel is a real beginning, not a lesser version. Everything I use now grew out of what those first barrels taught me. Start with one, learn how water moves around your space, and add on only when you're ready.
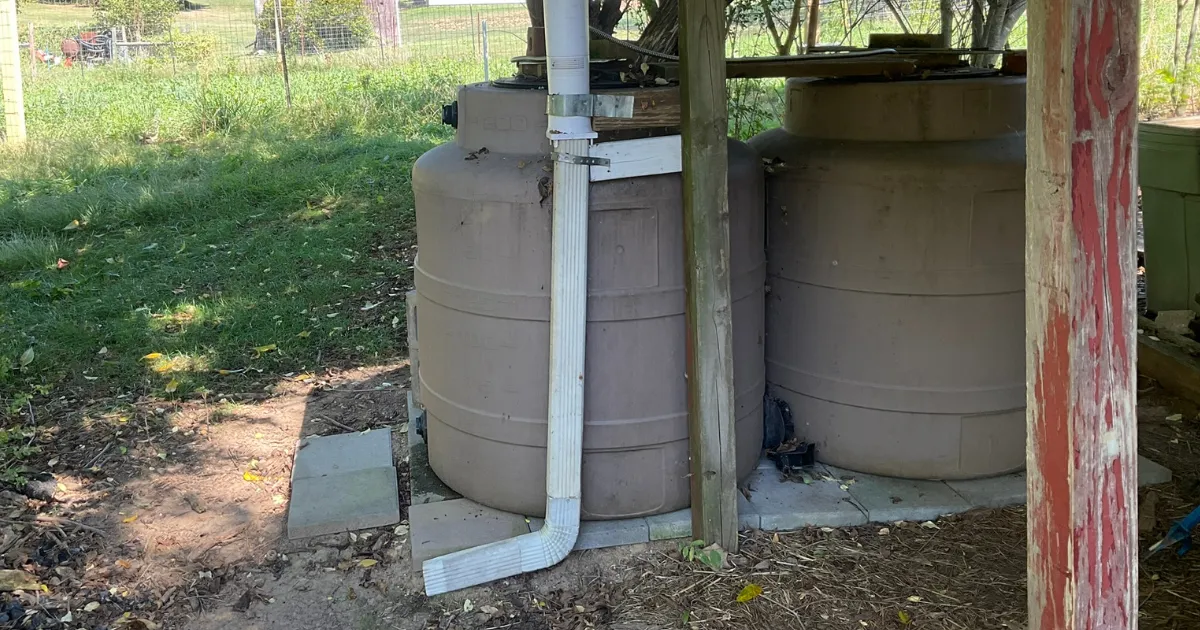 Our setup today: tanks fed by the shed roof, with a first flush diverter.

Amy DeVries helps beginner urban homesteaders learn by doing. A lifelong gardener, she has grown food in spaces that expanded to 16 raised beds, patio containers, dwarf fruit and nut trees, and gravity-fed rainwater systems. She shares practical lessons shaped by real experience. Amy homeschools her children and teaches the same hands-on skills that guide her work.
FYI: This website contains affiliate links. As an Amazon Associate I earn from qualifying purchases.

 Homesteading and homeschooling near Baltimore, Maryland
Recent Articles


-
Paleo Gingerbread with Coconut Flour
Oct 25, 26 07:27 AM
 Looking for grain-free paleo gingerbread? This is a very tasty recipe that can be used to make bars or soft cookies.
-
Monthly Sensory Bins
Oct 03, 26 07:43 AM
 Exploring monthly sensory bins is a fun way to help young children develop their senses and imagination.
-
Traditional Quilt Blocks for Elementary Math
Sep 13, 26 09:16 AM
 Use traditional quilt blocks to teach geometry, fractions, and patterning with coloring pages, pattern block activities, and creative classroom ideas.
More Information
Disclosure
All information found on this website is editorial in nature and intended to motivate and inspire rather than be used as medical advice or legal advice.
As an Amazon Associate, I earn from qualifying purchases. I also use Google Ads and cookies as described in the Privacy Policy.
Thank you for your support!
By Amy DeVries, Copyright © 2011-2026 Sage-Urban-Homesteading.com All rights reserved.
