FYI: I earn a small commission from some links and advertisements.
- Home
- Embroidery
- Silk Ribbon Embroidery
Elegant Silk Ribbon Embroidery
You can easily create gorgeous dimensional flowers and leaves with silk ribbon embroidery. Sew a silk ribbon garden that will bloom all year!

I love the way silk ribbon looks. It's so feminine with the bright colors and flow of the luxurious ribbon.
My Silk Ribbon Embroidery Story
During the Victorian revival in the late 1980s and early 1990s, I first saw ribbon embroidery featured in some home magazines. It was so pretty!
I could not handle a new hobby at the time, so the articles I'd carefully clipped became buried in my storage folder. I rediscovered them in 2004.
There was a cross stitch pattern with ribbon embroidery accents that I'd saved. It was dated 1995. The year 2005 was going to be special for me because I was graduating from college. So my graduation present for myself was to finally bring that old pattern to life and give ribbon embroidery a try!

In my photos here, you can see the flowers and leaves of the plants in the cross stitch pots are done in silk ribbon. Below is a close-up shot.

It's fairly easy. The stitches are similar to those used in crewelwork. The difference is that ribbon allows you to make textured leaves, flower petals, and ribbon roses.
This embroidery method is used most often to simulate floral effects, so most of the stitches are for leaves or flowers.
I'm sure you could adapt the ribbon techniques for use in any design where you want texture.
Just keep in mind the fact that ribbon behaves a little differently than thread.
When you begin silk ribbon embroidery stitches, it's best to lock the ribbon onto your needle so it doesn't slip out.

Simply poke the needle through the ribbon near the end to lock it in place.
Silk Ribbon Embroidery Stitches
- Straight Stitch
- Make a straight line. So simple! Let the ribbon lay flat or add twist for a rolled tube effect.
- Backstitch
- Enter midway next to the last stitch, as with the normal crewelwork backstitch. The difference with ribbon embroidery is it's tendency to twist. The rolled tube effect makes great stems!
- Leaf Stitch
- Insert the ribbon through itself when reentering the fabric to create a curl at one end. Make sure it's lying flat to start, and don't pull too tightly. You can change the look by piercing the ribbon in the center, to the right, or to the left. Experiment!
- This stitch can be used with the curl at the inner or outer end. I think makes nice leaves if stitched short distances with the curl at the stem. For flower petals, I like the curl at the other end, the flower edge, and longer length stitches.
- Split Stitch
- This is a line of leaf stitches worked on top of each other at the halfway point like a backstitch.
- Lazy Daisy
- Make a loose loop then another small stitch to hold it in place. This looks nice as rounded leaves, flower buds, or large fluffy petals. You can vary the effect depending on the twist in the ribbon and where you stitch it down. Again, experiment until you find the look you want.
- You can leave the entrance and exit points for the loop wider apart and lengthen the small stitch into a stem, then make a whole line of them to create a fern leaf.
- French Knot
- Pointing the needle in the direction of the ribbon exiting the fabric, loop ribbon around the needle two or three times. Now insert the needle back into the fabric only a short distance away, and gently pull it through. The knots make nice small flowers or berries.

Combine these stitches to make whatever kind of silk ribbon embroidery you want. It can be simple or elaborate.
Embroider a Silk Ribbon Rose
Learning how to make ribbon roses is easier than you might expect. Sure, you can now buy cheap ribbon flowers to glue on, but nothing looks as good as the real thing.
A genuine, handmade rose has far more detail and texture, and is attached much more securely.
They're easy to make. And fun!
How to Make an Embroidered Rose in Three Steps
- Start with a spider web base worked in thread. Choose a color that matches the ribbon color. The base should look like a five spoke asterisk.
- Bring the ribbon up to enter in the middle and start weaving in and out on the spokes, around and around. It doesn't matter whether you go clockwise or counterclockwise. Just keep going in the same direction. Allow the ribbon to twist where it looks best.
- When the spokes are covered, end by stitching an exit through the fabric just under the last round. Secure the ribbon with a small knot on the back.

You now have a beautiful, handmade rose!
You can add leaves and a stem to your rose with other silk ribbon embroidery stitches as shown above on this page.
Rosie Ideas
- Place a bead in the center or add a bead as a dewdrop on a petal or leaf.
- Make a small rose as a center in a stitched flower.
- Make roses of different sizes by changing the spider web spoke length and using different sized ribbons.
I still love the look of silk ribbon and find this embroidery method very attractive!
More to Explore


FYI: I earn a small commission from some links and advertisements.
Recent Articles
-
Carob Chips - No Soy, No Dairy, No Worries
Feb 14, 26 04:12 PM
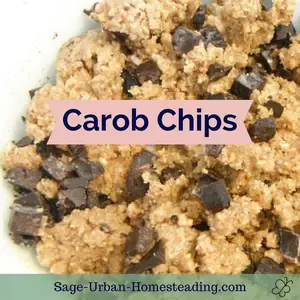 Enjoy the taste of chocolate chips without the pains of food sensitivities. With this recipe, you can easily make carob chips that are dairy free and soy free.
 -
Quilt Making Basics
Jan 13, 26 08:04 AM
 Want to learn easy quilt making? Explore traditional blocks and learn what to do with your fabric scraps.
 -
Sock Yarn Advice
Jan 02, 25 09:50 AM
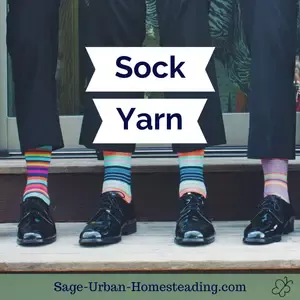 Decide on the best fiber blend for your sock yarn and learn how to choose the right yarn colors.
Sign Up for Free Updates

More Information
Connect
Disclosure
All information found on this website is editorial in nature and intended to motivate and inspire rather than be used as medical advice.
I am an Amazon Affiliate and use Google Ads and cookies as described in the Privacy Policy.
Thank you for your support!
By Amy DeVries, Copyright © 2011-2026 Sage-Urban-Homesteading.com All rights reserved.