FYI: I earn a small commission from some links and advertisements.
- Home
- Embroidery
- Painted Needlepoint Canvas
DIY Printed or Painted
Needlepoint Canvas
Having trouble finding a painted needlepoint canvas that suits your style and fits your budget? You can print or paint your own canvas! It's easier than you think.

Painted Needlepoint Canvas
Did you know that you can print your own needlework patterns for use on blank canvas?
The drawback is that you are limited by the paper sheet size your printer can handle, but it is not as painstaking as counting threads to paint them.
There are other methods of making your own design by using transfer paper and an iron, but I like to do it this way.
- Select clipart or a photo with good contrast, as when designing your own cross stitch pattern. Scan and save the photo then check the image size to be sure you can print it the way you want it.
- Print the photo out on normal printing paper.
- Use acrylic gel or medium (check for the words "acrylic polymer" on the bottle or tube) and coat your printed image then let it dry.
- Repeat this four more times then let it dry overnight.
- Soak the coated image in water for 15 minutes and rub the paper away. You'll be left with a decal: a thin, clear plastic sheet with your embedded design.
- Glue this onto your canvas with paper adhesive, and you're ready to stitch!
I know this decal method works for inkjet printers, which is what I have, but I'm not sure about laser jets. If you've tried transferring images from a printer, please let me know which printed or painted needlepoint canvas method you used and how it turned out!
A comment on March 18, 2010:
"I printed a royalty-free picture on my color inkjet printer, covered it
with acrylic polymer (I used a little roller and got an even, smooth
coat) according to your instructions. Then I used removable spray glue
and pressed it on the canvas. Heavy book overnight pressed it firmly and
flat - canvas between two sheets of cardboard. The polymer film is so
thin that the needle easily passes through. It works wonderful." ~ Trudy
Printed Canvas
Personally, I think the printing method is easiest, but if you're computer phobic, hand painting is easier. It's also better for controlling detail since you can adjust the color of the intersections as needed.
- Have your design charted or lay a grid over it. An easier option is to have an extra copy of the design that you can put on the table, tape the canvas on top of it, and paint right onto it.
- The best type of paint to use is acrylic because it won't bleed if it becomes wet. Thin the paint enough so that it doesn't clog the canvas mesh holes. If one does clog, blow on it right away while the paint is still wet.
- Use a firm brush with short bristles to cover the bumps of the canvas accurately and thoroughly. Pay special attention to hitting the intersection points since that's where you stitch.
- Give the canvas two coats of paint, allowing it to dry between coats.
Now you have your own printed or hand painted needlepoint canvas.
You are ready to stitch an original, exclusive, limited edition design that you made yourself!
Why not reupholster a stool using painted needlepoint canvas to show off your skilled work? Other easy and fun project ideas are pillows and wall hangings.
More to Explore


FYI: I earn a small commission from some links and advertisements.
Recent Articles
-
Carob Chips - No Soy, No Dairy, No Worries
Feb 14, 26 04:12 PM
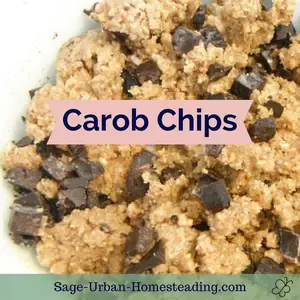 Enjoy the taste of chocolate chips without the pains of food sensitivities. With this recipe, you can easily make carob chips that are dairy free and soy free.
 -
Quilt Making Basics
Jan 13, 26 08:04 AM
 Want to learn easy quilt making? Explore traditional blocks and learn what to do with your fabric scraps.
 -
Sock Yarn Advice
Jan 02, 25 09:50 AM
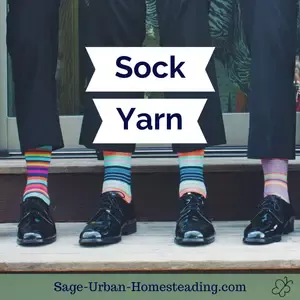 Decide on the best fiber blend for your sock yarn and learn how to choose the right yarn colors.
Sign Up for Free Updates

More Information
Connect
Disclosure
All information found on this website is editorial in nature and intended to motivate and inspire rather than be used as medical advice.
I am an Amazon Affiliate and use Google Ads and cookies as described in the Privacy Policy.
Thank you for your support!
By Amy DeVries, Copyright © 2011-2026 Sage-Urban-Homesteading.com All rights reserved.