FYI: I earn a small commission from some links and advertisements.
- Home
- Embroidery
- Cross Stitch Stocking
Cross Stitch Christmas Stocking
Hand stitching a counted cross stitch Christmas stocking is a popular
way to demonstrate your skills and create a treasured family heirloom.

Handmade items at the holidays are especially memorable.
They're a gift you can't buy, the gift of your time and thought as you spend hours embroidering.
Many companies offer stockings as a Christmas cross stitch pattern. Shepherd's Bush releases a new design every year. There's also a new design each year in the Stoney Creek Cross Stitch Collection magazine.
Embroidered Christmas stockings can be used each year as a family tradition to celebrate the holidays.
It's easy to personalize a Christmas stocking with the intended recipient's name at the top. You can also embellish counted cross stitch Christmas stockings with other embroidery types or by adding beads or charms.
How to Finish a Cross Stitch Christmas Stocking
- Baste the stocking outline onto the fabric you stitched and embroidered. This will be where you sew everything together later. Trim 1 inch beyond this line to remove excess fabric, then zigzag or serge the raw edges to prevent excessive fraying.
- Cut the backing fabric and two pieces of liner fabric to roughly match the new shape of the embroidered fabric.
- Lay the backing fabric right side up then place the embroidered fabric face down on top of it. Carefully sew them together along the basting line. Remember to leave the top of the stocking open! Remove the basting threads when you're done.
- Sew the two pieces of liner fabric with right sides facing. Leave the top of the stocking open, and leave an opening wide enough for your fingers at the toe. This opening will be used to turn the stocking right side out later.
- Finish the top of the stocking (the embroidered fabric and backing fabric, not the stocking liner). You can add a trim or simply fold the edges down and sew. Insert and sew in a loop so you'll be able to hang the stocking.
- Turn the stocking liner right side out. Put it down into the stocking so the right side of the liner touches the embroidered side of the stocking and the right side of the backing fabric.
- Sew the lining at the top of the stocking, carefully folding under and hiding the raw edges.
- Pull the liner out of the stocking and find the opening at the toe. Everything should be wrong side out. Carefully pull the embroidered stocking through the hole to make everything right side out.
- Stitch the liner toe opening closed, being sure to hide all raw edges.
- Push the liner back down into the stocking. If you want, you can flip it inside out and do a few stitches in the bottom of the stocking inside to keep the liner from being pulled out by eager little hands.
You now have a handmade counted cross stitch Christmas stocking to hang on the mantle in a place of honor every year!

FYI: I earn a small commission from some links and advertisements.
Recent Articles
-
Carob Chips - No Soy, No Dairy, No Worries
Feb 14, 26 04:12 PM
 Enjoy the taste of chocolate chips without the pains of food sensitivities. With this recipe, you can easily make carob chips that are dairy free and soy free.
 -
Quilt Making Basics
Jan 13, 26 08:04 AM
 Want to learn easy quilt making? Explore traditional blocks and learn what to do with your fabric scraps.
 -
Sock Yarn Advice
Jan 02, 25 09:50 AM
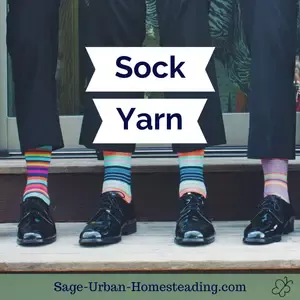 Decide on the best fiber blend for your sock yarn and learn how to choose the right yarn colors.
Sign Up for Free Updates

More Information
Connect
Disclosure
All information found on this website is editorial in nature and intended to motivate and inspire rather than be used as medical advice.
I am an Amazon Affiliate and use Google Ads and cookies as described in the Privacy Policy.
Thank you for your support!
By Amy DeVries, Copyright © 2011-2026 Sage-Urban-Homesteading.com All rights reserved.